This article takes you through the step by step process to set up Google Search Console for your website.
It assumes you already have a general Google Account (an email address that you use to log into Google and access Google services such as Gmail, Google Drive, YouTube etc).
If you don’t have one, please go to google.com and sign up – it’s free.
Step One – Sign In To Google Search Console
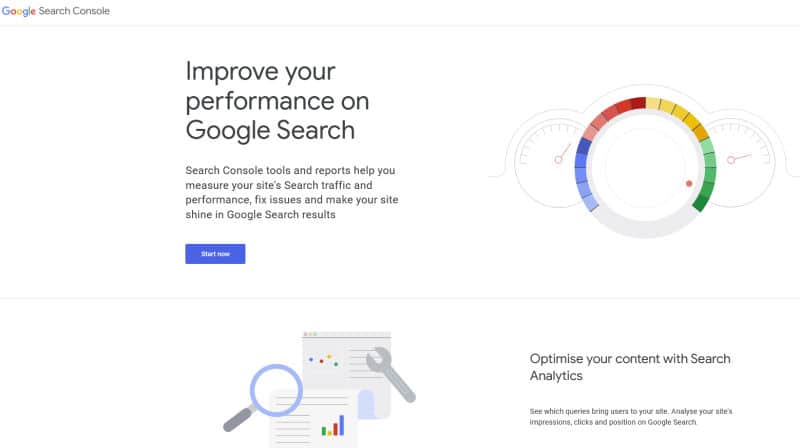
Visit Google Search Console and click the ‘start Now’ button. If you are not already, it will prompt you to sign in with your Google account,

Step Two – Add Your Website
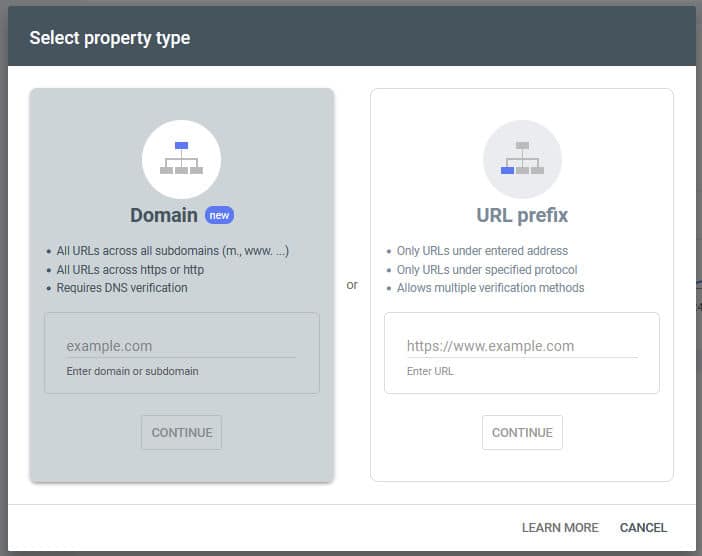
Google refers to your website as a ‘property’ so you will see a screen asking you to select property type, showing 2 options:
- Domain – this covers all vairations of your website (e.g. with or without the www. or http & https etc)
- URL Prefix – this covers just the single URL version you enter
Ideally, you should follow the Domain option on the left, but to do this, you need to have access to the account where you registered your domain (e.g. GoDaddy, Namecheap, 123-reg etc.)

Enter Your Domain or URL:
- For Domain property: Enter your domain (e.g., example.com) and click “Continue.”
- For URL Prefix property: Enter the full URL of your website (e.g., https://www.example.com or https://example.com – go with the version that shows in the top URL box when you visit it on your computer) and click “Continue.”
Step Three – Verify Your Website Ownership
Option 1: Domain Property Verification (via DNS Record)
1. Get Verification Code:
After entering your domain, Google will provide a TXT record that you need to add to your domain’s DNS settings.
2. Log in to Your Domain Registrar:
Log in to the account where you registered your domain (e.g., GoDaddy, Namecheap, Cloudflare).
Add the TXT Record:
3. Navigate to the DNS settings for your domain.
Add a new TXT record and paste the code provided by Google into the “Value” field.
Save the changes.
4. Verify in Google Search Console:
Go back to Google Search Console and click “Verify.”
It may take a few minutes or longer for the DNS changes to propagate. Once done, Google will verify your ownership.
Option 2: URL Prefix Verification
Choose one of the following 5 methods:
1. Use HTML File Upload (Recommended):
- Download the HTML file provided by Google.
- Upload this file to the root directory of your website using an FTP client or your website’s file manager.
- After uploading, click “Verify” in Search Console.
2. Use HTML Tag:
- Copy the meta tag provided by Google.
- Paste it into the <head> section of your website’s HTML code, just before the closing </head> tag.
- Save the changes and click “Verify” in Search Console.
3. Google Analytics:
- If you have Google Analytics (with tracking code installed on your site) using the same Google account, select this option to verify automatically.
4. Google Tag Manager:
- If you use Google Tag Manager, choose this method to verify automatically, provided the container snippet is correctly installed on your site.
5. Domain Name Provider:
- Choose your domain name provider from the list and follow the on-screen instructions to verify.
Step Four – Submit Your Sitemap (Optional but Highly Recommnded)
What is a Sitemap?
A sitemap is a file that lists all the important pages on your website, helping search engines like Google to crawl your site more effectively. Once you find out where yours is located, you can submit it to Google.
Usually you can find your index in one of 4 places:
- sitename.com/sitemap_index.xml
- sitename.com/sitemap.xml
- sitename.com/sitemap/
- sitename.com/sitemap-index.xml
If you have a wordpress website and use the Yoast plugin then it will probably be located in the first place shown in the list above.
You can test each of these by replacing ‘sitename.com‘ with your own website domain & see which works.
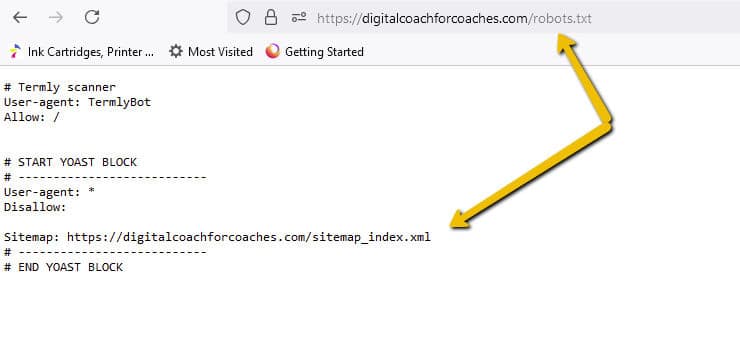
Another method is to do a robot.txt search. Enter: sitename.com/robots.txt (again replace sitename.com with your own domain) into Google and see what comes up – here is in an example of the result for this website:

How To Submit Your Sitemap:
- In Google Search Console, in the lefthand navigation area, go to “Sitemaps.”
- In the “Add a new sitemap” field, enter the URL of your sitemap (usually something like https://www.example.com/sitemap.xml).
- Click “Submit.”
- Check Sitemap Status:
After submitting, referesh your screen and check the status column to ensure Google successfully fetched and indexed your sitemap – it should say ‘Success’ in green text.
In Summary
By setting up Google Search Console, you’ve taken an important step in managing and optimising your website’s presence in Google Search. Regularly check your Search Console for updates on your site’s performance, indexing status, and any issues that need attention. This will help you maintain a strong online presence and improve your search rankings over time.
If you have enjoyed this article join my free newsletter for more more tips on creating amazing content that will help you grow your business. Please subscribe here:


[…] If you’ve not heard of Google Search Console, you can read more here: Has Google Indexed My Site? or follow the instuctions in this blog post to create your free account: How to Set Up Google Search Console for your Website. […]