When you first share a blog post or article link from your website to social media, the platform will automatically visit the link to gather some outline information and generate a preview to appear with your post text. It stores this information for use in the future which is great until you make any changes. So how do you clear facebook cache or linkedin post cache if you change your image or the meta data on your website?
In case you are not familiar with cache, let me start by providing you a brief overview.
Cache is the name for frequently accessed data that is stored as temporary files so it can be retrieved quickly. This data may include website images, scripts, meta descriptions and other components that make up the website.
When a user visits a website or social media platform, the browser or platform will first check to see if the data is in the cache. If it is, it will serve the data from the platform or browser cache, which will result in a better user experience as it ensures a faster loading time. If the data is not in the cache, the browser will request it from the website’s web server, and then store it in the cache for future use.
On to how to clear cache…
The main data that is usually displayed in a social media post is the feature image, meta title and sometimes, a meta description.
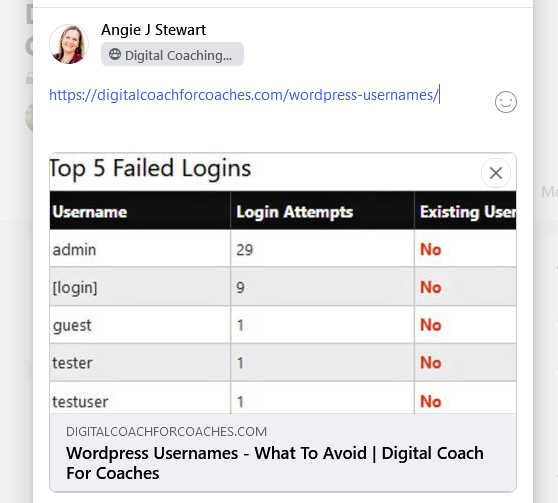
This is an example of a blog post link of mine, within Facebook, displaying an old feature image.
I need to clear the cache both within Facebook and LinkedIn so that it shows the new, improved image when I share it to my followers.
Clear Facebook Post Cache
Clearing facebook cache is actually pretty easy as Facebook provides a developers link you can use: https://developers.facebook.com/tools/debug
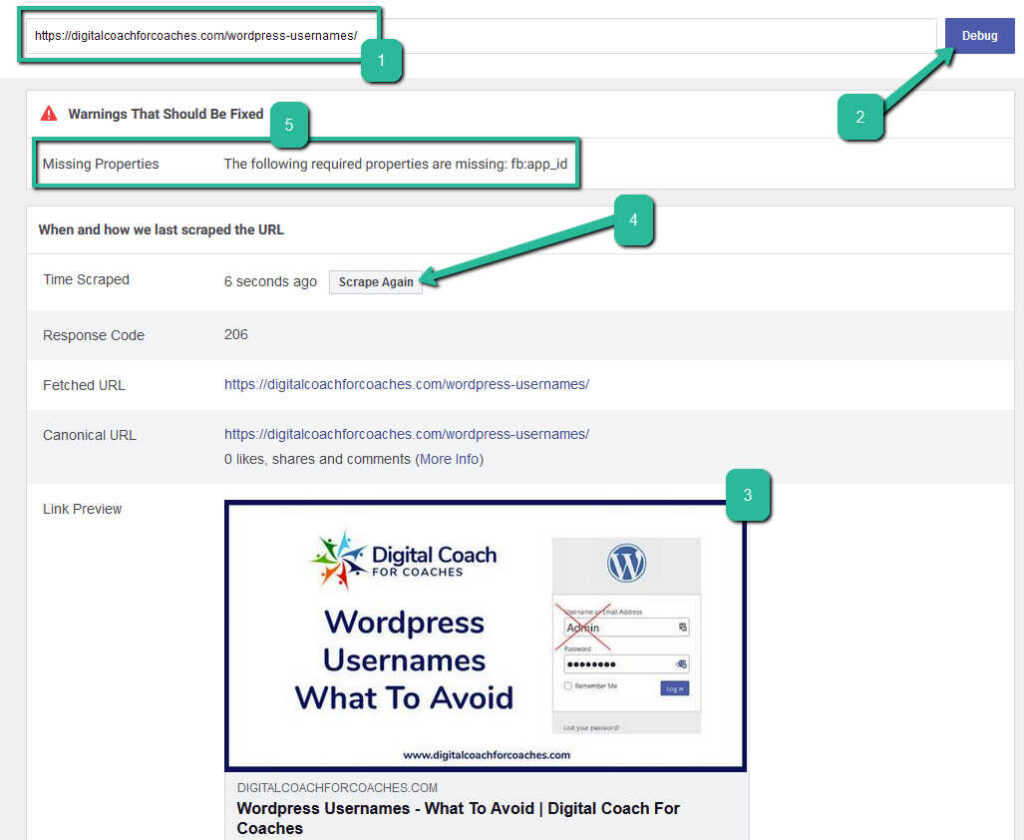
You will need the url of your website post / page to hand when you visit it, which you put into the top box, marked “1” in the image above.
Next press the debug button (2) which instructs Facebook to visit your url, collect the data and display it as a preview (3). If the new data shown is still out of date, you may have to click the “Scrape Again” button (4).
Sometimes you may see a warning message (5) – if this message refers to “fb:app_id” as it does in this example – you can ignore this as it isn’t required and hasn’t been for a number of years.
Once the information preview displays the correct information, you are good to share your link within a Facebook post.
How To Clear LinkedIn Cache
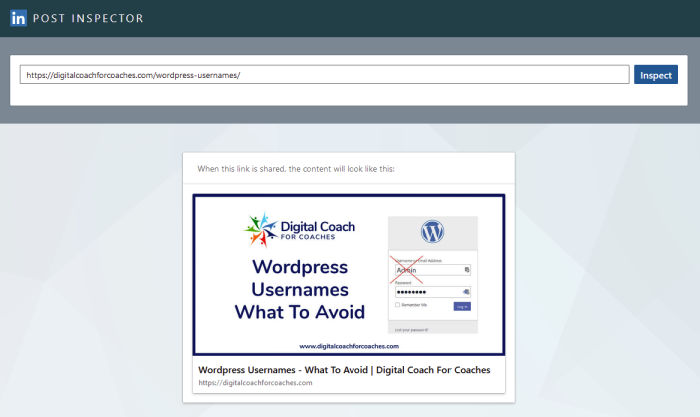
The LinkedIn tool which works in a very similar way is called Post Inspector and can be found here: https://www.linkedin.com/post-inspector/
If you regularly share your website content on social media, I recommend you get into a habit of clearing your Facebook and LinkedIn cache as soon as you update any page or post feature images. If I don’t do this, I generally find it will always need doing when I’m posting in a rush!
Happy sharing.




Leave A Comment